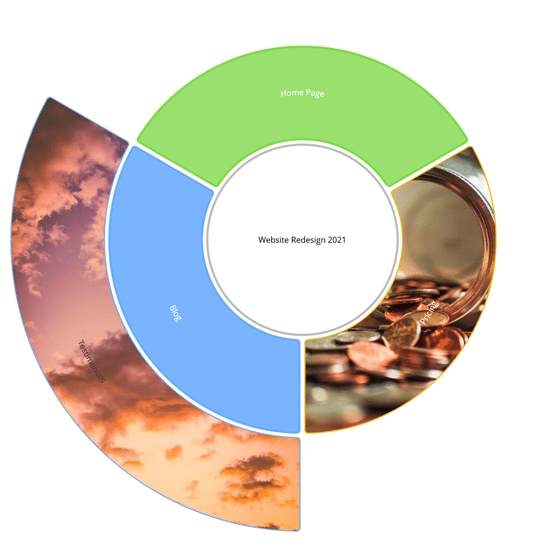
Present your ideas in a visual pie-chart, and easily see your priorities by adjusting the sizes of the segments in your map to signify their importance.
Below you will find a step-by-step detail explaining how to create a new Radial Map from scratch, as well as how to switch views between Mind Map and Radial Map
Creating a Radial Map
1. Navigate to the home page and click +New Project

2. Select the Blank Mind Map option and name your project

3. Under the Advanced Options, at the bottom of the window, you can add a map description and any people you wish to collaborate with. Once that is done, click Create.

4. In the new window, you will have the option to select the central idea box for your mind map.

5. Once the Mind Map is created, change the view to Radial Map in settings in the top right corner.

6. At the centre of the project board will be your central segment. By default, the title will be the name of the Map. You can change this by double-clicking on the text and typing your new central idea.

5. To add your first segment either click the green + icon, or use Tab on your keyboard.

6. To add a segment on the same level, either click the green + on the parent segment ( the inner segment before it), or use Enter on the keyboard.
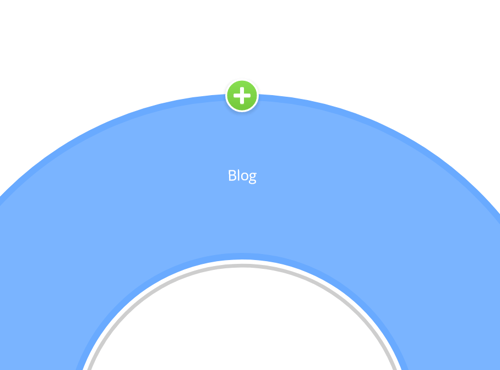
7. As you create more layers of segments, the segments on the outermost ring will be slimmer. As more segments are added to the same level, the segments will be reduced in width.
Converting a Mind Map to a Radial Map
You can switch to Radial Map at any time from either a Mind Map or Capture Map view:
1. Open your Mind Map.

2. Click on the Settings icon located in the top right corner of the screen. Then, click on View and select Radial Map from the drop-down menu.

3. Your Map will now be changed to a Radial Map. You can change it back at any time by repeating the steps above, and selecting Mind Map
