New users signing up after August 2024 will need to turn the user group settings on in their app settings.
To access the app settings click into the main menu

The select app settings and toggle user groups on.

You can set up groups of people that everyone on your AYOA plan can see and use, such as departments or offices, or choose to keep them private.
You can also set up your own groups to help you quickly add people you work with on a regular basis to your projects.
There are two types of groups you can create; "Your Groups" and "Groups in your Ayoa Plan".
"Your Groups" can include any of your contacts including free users, those on a different subscription plan and outside of your Ayoa subscription Plan.
"Groups in your AYOA Plan" can be made up of people that have been added to the same subscription plan as you. For example, if you had been invited to a 10 user subscription plan, you could make groups from the other 9 users who have also been invited to that plan. You can make these plans visible to everyone else on the plan so that they can use them too. This option is only available if you have a team subscription.
Creating Your Groups
To access "Groups" you must have an Ultimate subscription plan.
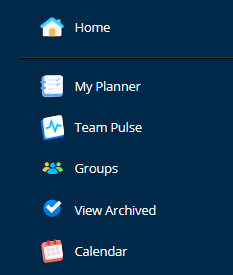
1. To create your own group, first, click on the AYOA main menu
In the menu, click on "Groups".
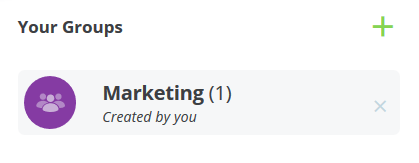
3. This will provide the following view:
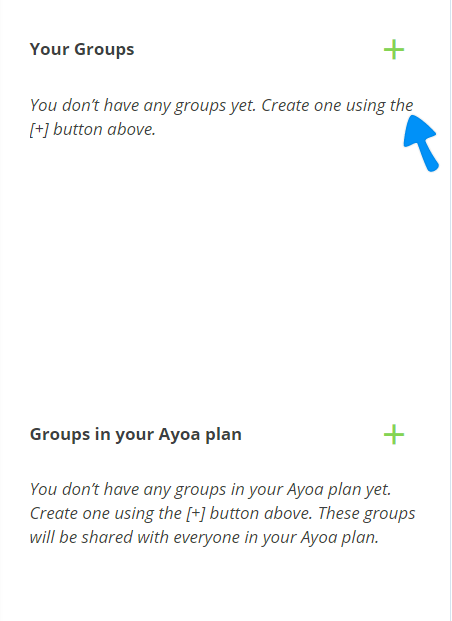
4. Next to "Your Groups" click the green + icon.

5. Name your Group.
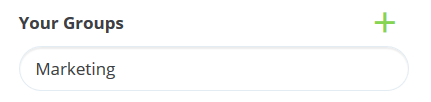
Then tap enter to confirm.
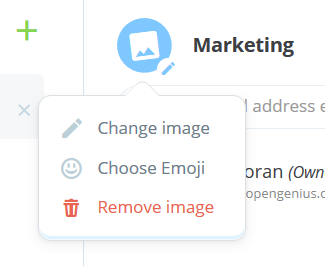
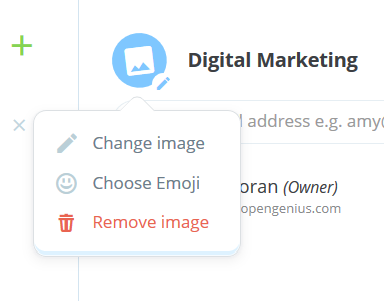
6. Add an avatar for your group by clicking on the image icon.
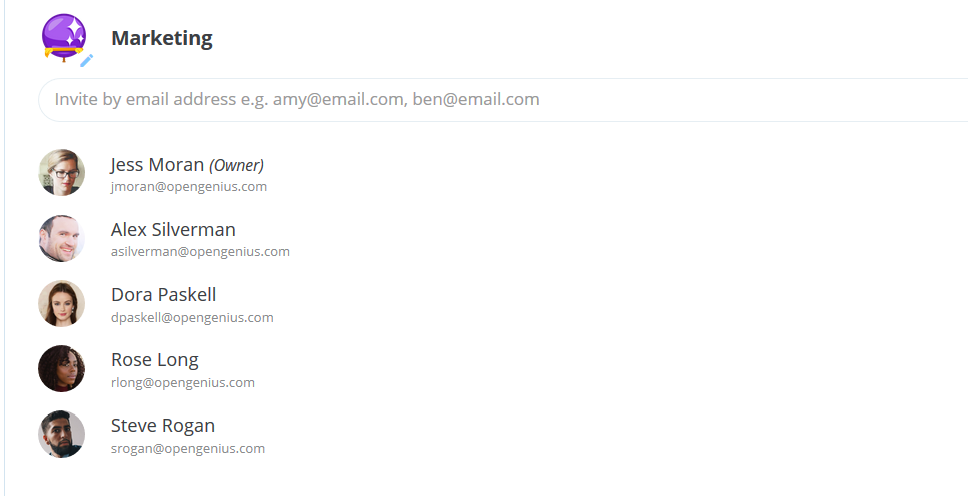
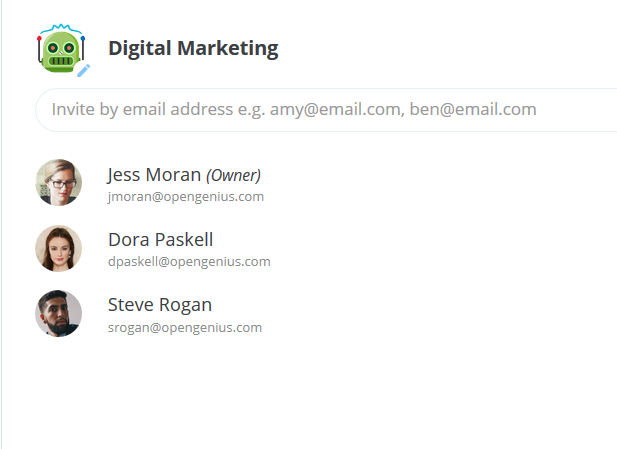
7. Once your Group is created you can add your contacts.
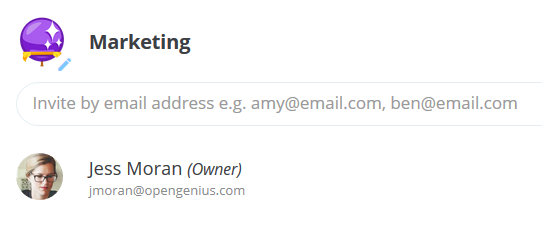
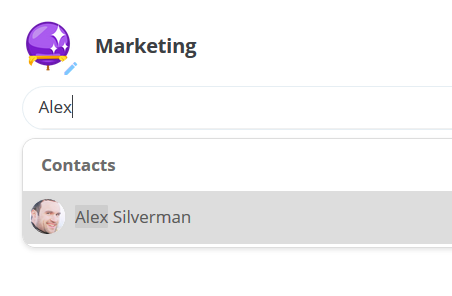
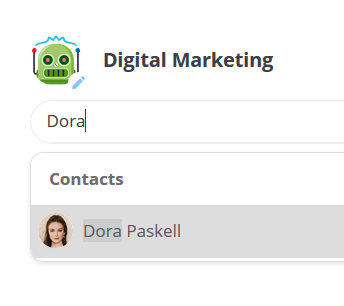
8. Type in the user name to search your existing contacts or type in their email to invite them to use AYOA. You can add anyone to your own groups, they do not need to be on the same subscription plan as you.
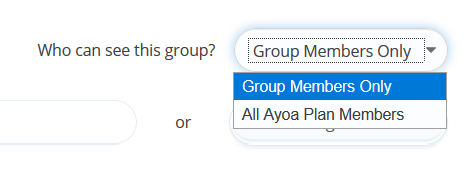
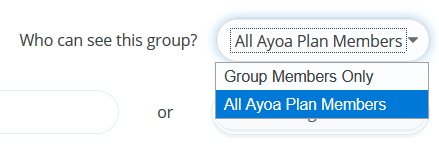
9. You can choose whether only members of the Group can see the team, or if everyone on your subscription plan can view it as well by clicking on the drop-down menu.
10. Once the Group is created you can quickly add the whole group to task boards, mind maps and chat groups without needing to invite each individual person.
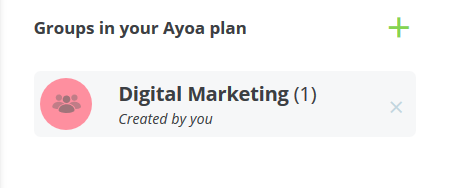
Groups in your AYOA Plan
If you are on a team subscription you can also create Groups made up of users on the same subscription plan.
1. To create your own Group, first, click on the menu.

2. In the menu, click on "Groups".

3. This will open your Groups options.
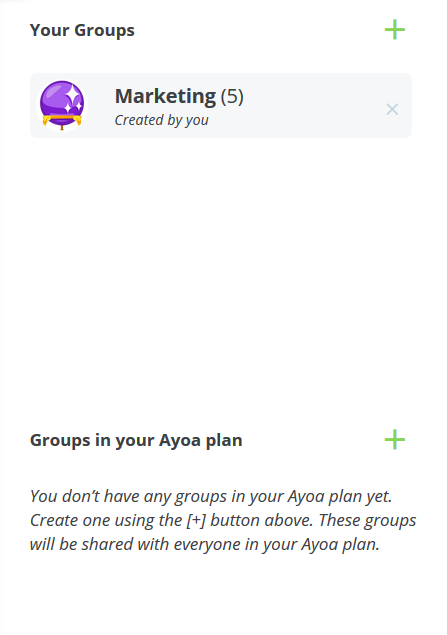
4. Next to "Groups in your AYOA Plan" click the green + icon.

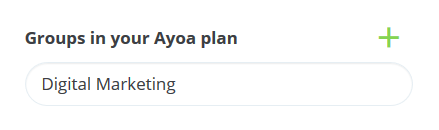
5. Name your Ayoa Plan Group.
Then tap enter to confirm.
6. Add an avatar for your group by clicking on the image icon.
7. Once your Group is created you can add your contacts.
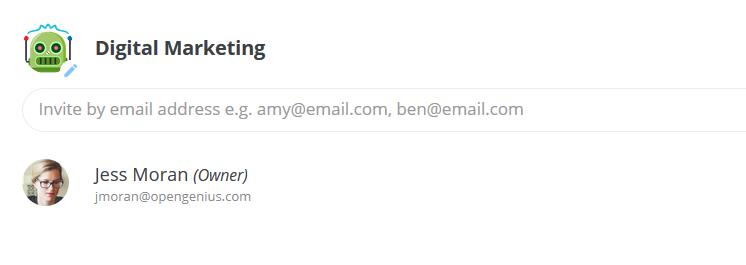
8. Type in the user name to search through the other users who are part of your subscription plan.
9. You can choose whether only members of the group can see the group, or if everyone on your subscription plan can view it as well by clicking on the drop-down menu.
10. Once the group is created you can quickly add the whole group to task boards, mind maps and chat groups without needing to invite each individual person.
Adding Groups to Task Boards
By creating Groups, you can quickly add multiple people to a Task Board to view, action and update Tasks.
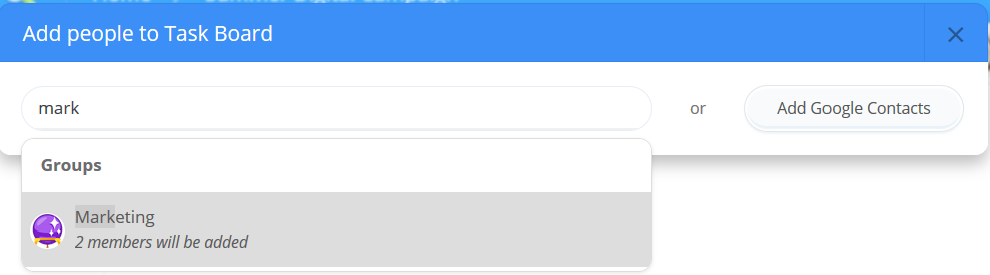
To do this when creating a new Task Board, simply type in the name of the group, then click the group name.
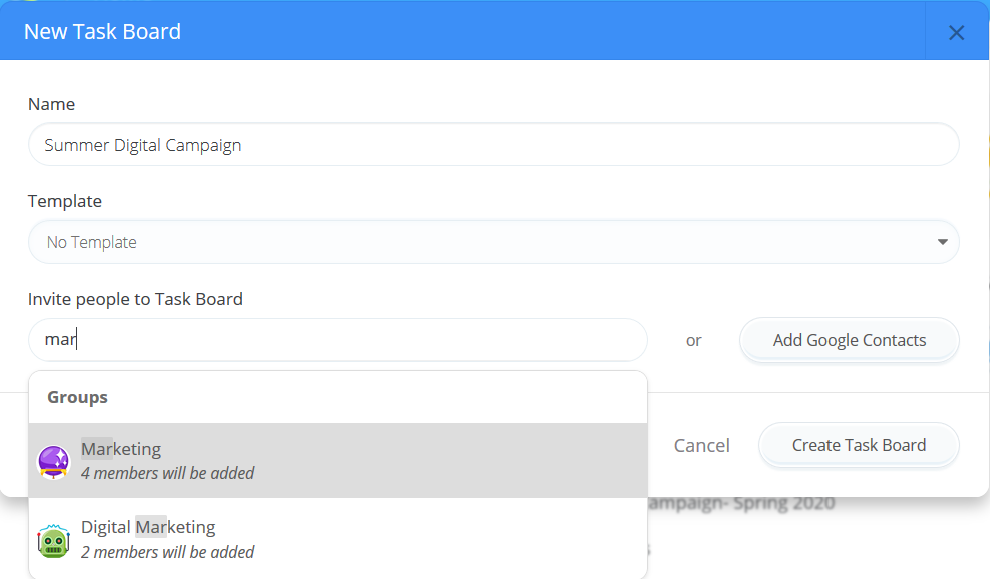
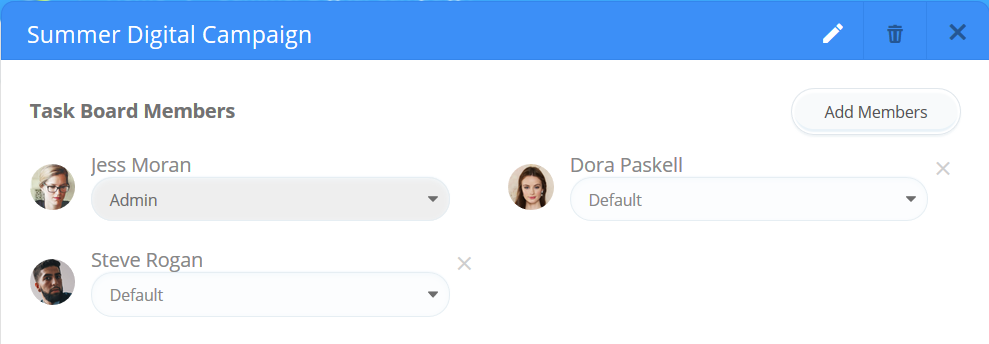
This will add all the members of the group. Click "Create Task Board" to confirm.
To invite a group to an existing Task Board, simply click 'share'
![]()
Then scroll down - you should be able to see individual contracts, and then
Type in the Group name and click it when it appears.
This will add all the members of that Group. Click "Invite X person to Mind Map" to confirm.
Adding Groups to Mind Maps
Open the Mind Map you wish to collaborate on.
Click on "Add" on the toolbar.

Type in the Group name and click it when it appears.
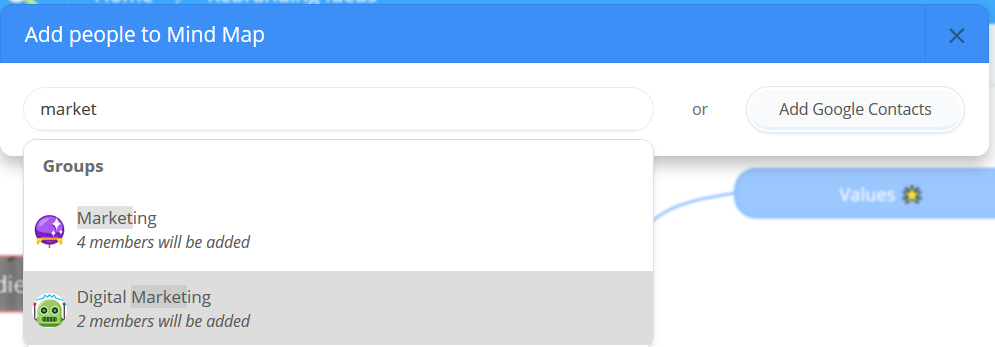
This will add all the members of that Group. Click "Invite X person to Mind Map" to confirm.

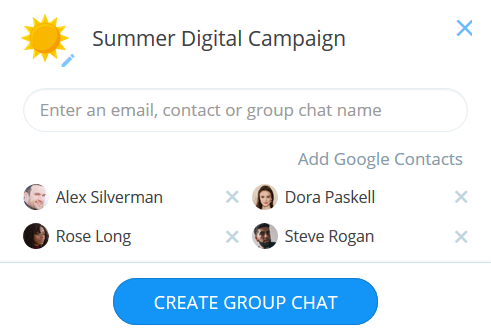
Adding Groups to AYOA Chat
Open Ayoa Chat on the right-hand side.
Click on the blue speech bubble icon.

Type the name of the Group and click it when it appears.
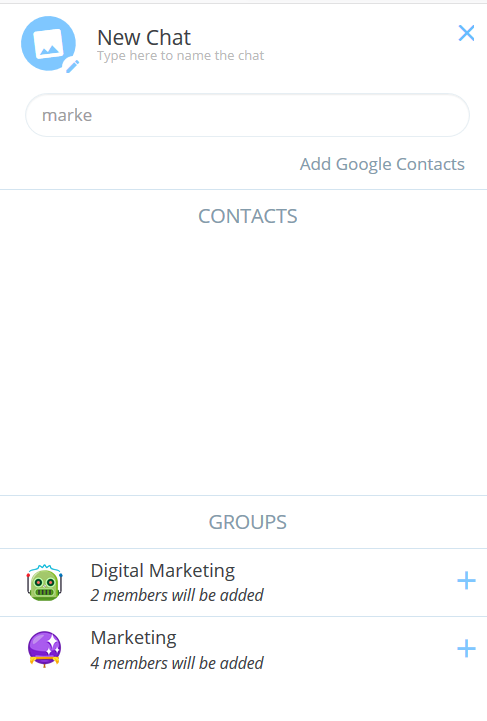
This will add all the users in that group.
Add any extra users and name the group if preferred, then click "Create Group Chat".