.png?height=120&name=Ayoa%20small%20(1).png)
Start or Due Dates are the first step in organizing your schedule and accountability.
Setting Start Dates
1. Select the task that you would like to set a Start Date for.
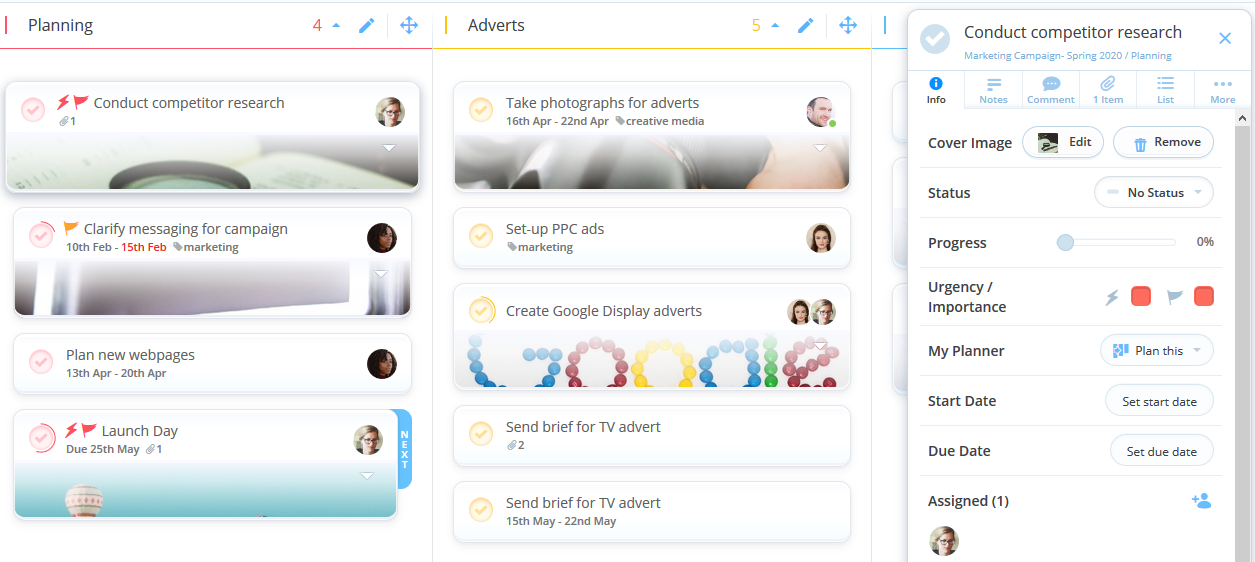
2. When the sidebar is open, select START, situated next to the Calendar icon.
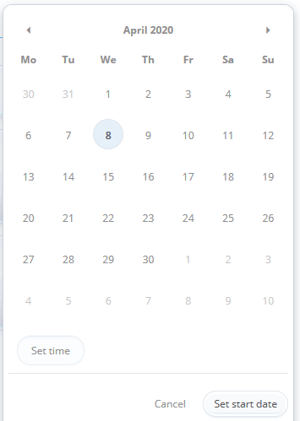
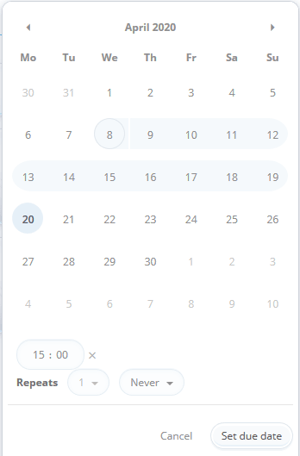
3. A date picker will open. From here, select the Start Date that you would like to apply, you can also apply a start time by clicking Set Time situated by the clock icon. If you don't set a start time it will automatically begin at 0.00 am on the date selected. Hit Done to complete the process.
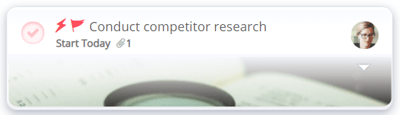
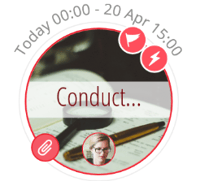
4. If you are using Workflow view the Start or Due dates will appear on the task directly under the task name. If using Canvas view the Start or Due dates appear on the outside of the task circle.
Setting Due Dates
1. Select the task that you would like to set a Due Date for.
2. When the sidebar is open, select DUE, situated next to the Calendar icon.
3. A date picker will open. From here, select the Due Date that you would like to apply, you can also apply a start time by clicking Set Time situated by the clock icon. If you don't set a start time it will automatically begin at 0.00 am on the date selected. Hit Done to complete the process.
4. If you are using Workflow view the Start or Due dates will appear on the task directly under the task name. If using Canvas view the Start or Due dates appear on the outside of the task circle.
Reminders
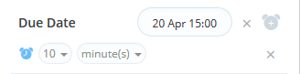
Ensure you stay on top of your deadlines by adding Start Date or Due Date reminders to your tasks. A 10-minute reminder will be automatically added to the task.
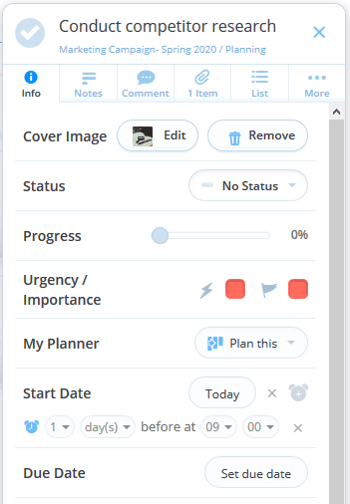
1. To add a reminder, click on the clock icon located next to the Start or Due date you wish to add a reminder for or edit the existing reminder.
2. If your Start or Due Date does not have a time assigned, your reminder will be set to 9 am the day before the Start or Due Date.
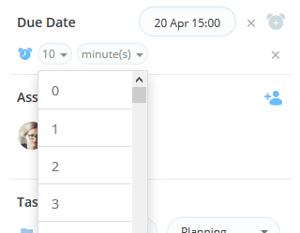
3. If your Start or Due date does have a time applied, you can choose to be notified minutes, hours or days ahead by clicking on Minute to open a drop-down menu. Click on the unit of time you would prefer to apply the change.
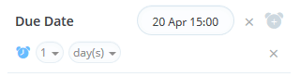
4. Then click on the number next to the measurement of time to specify exactly when you would prefer the reminder to be sent. Your reminders will now be applied. You can adjust these at any time. When the reminder is due you will be notified in your Notifications. You have the ability to configure these defaults via your App Settings, situated in the main menu.