-1.svg)
Use categories to organize your map, highlight key patterns and group ideas
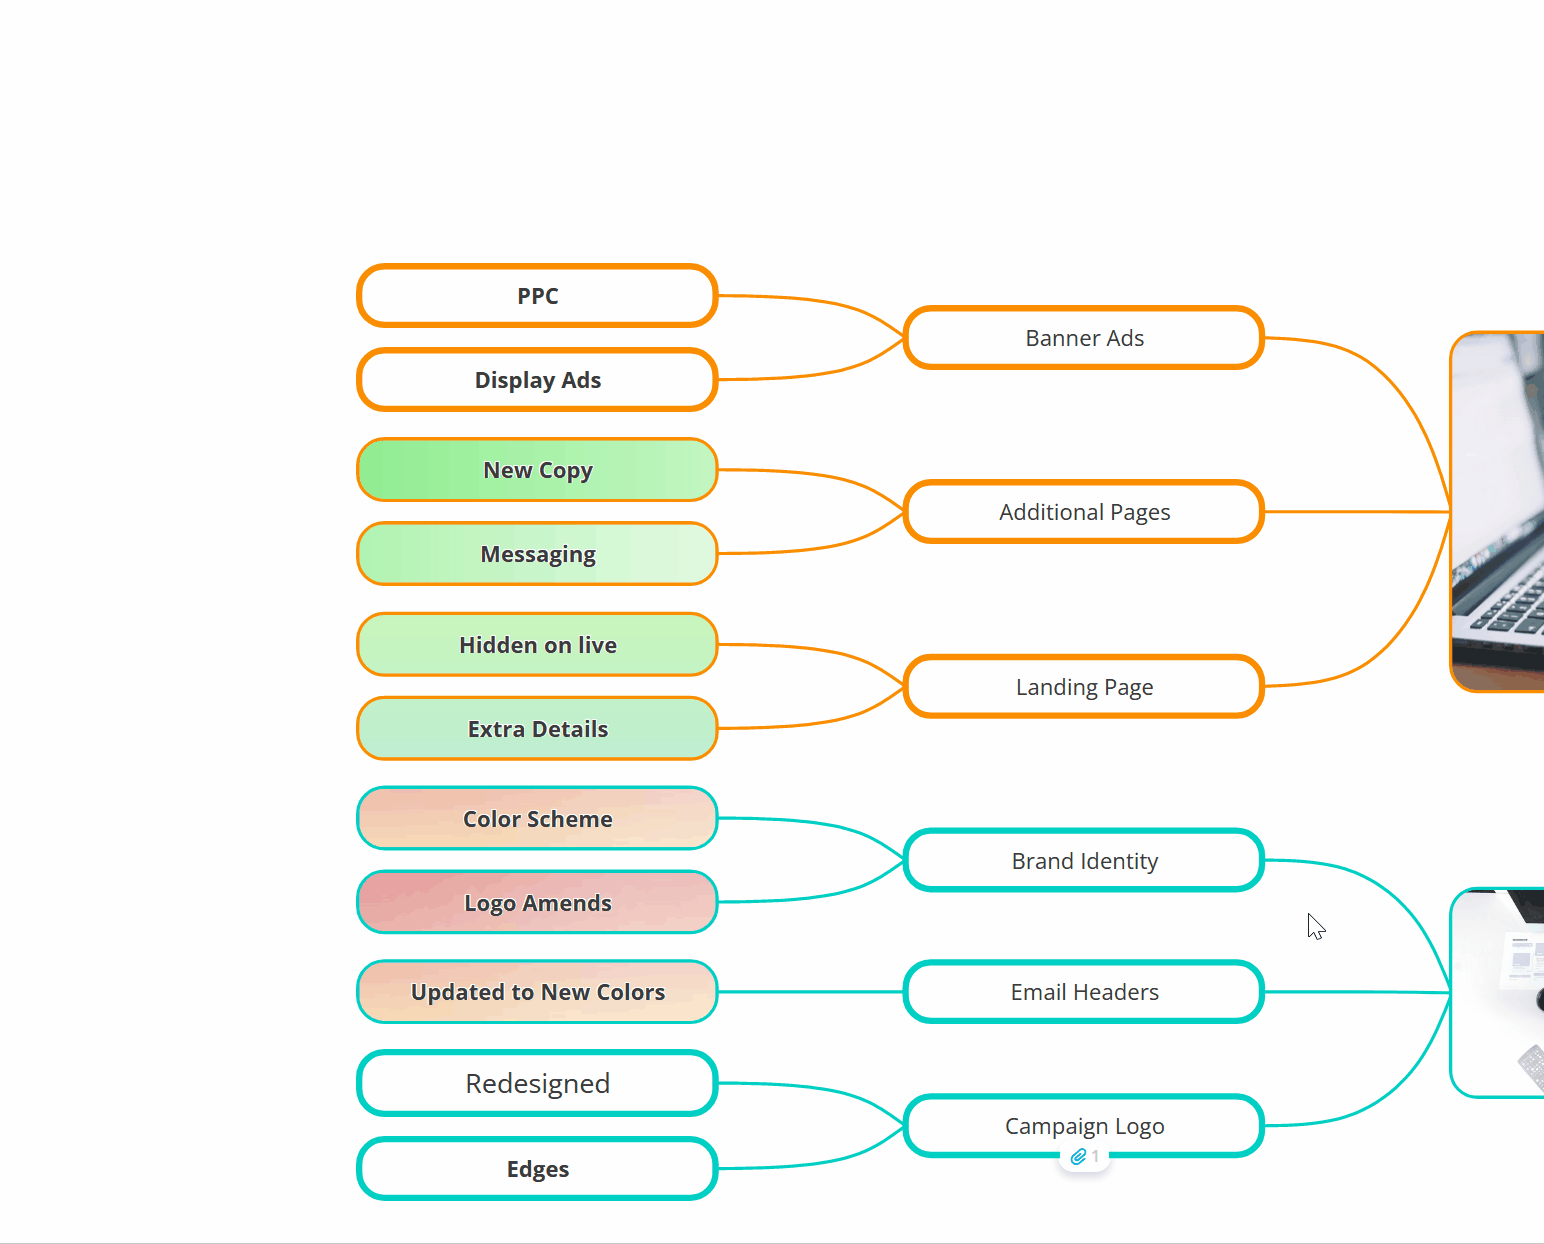
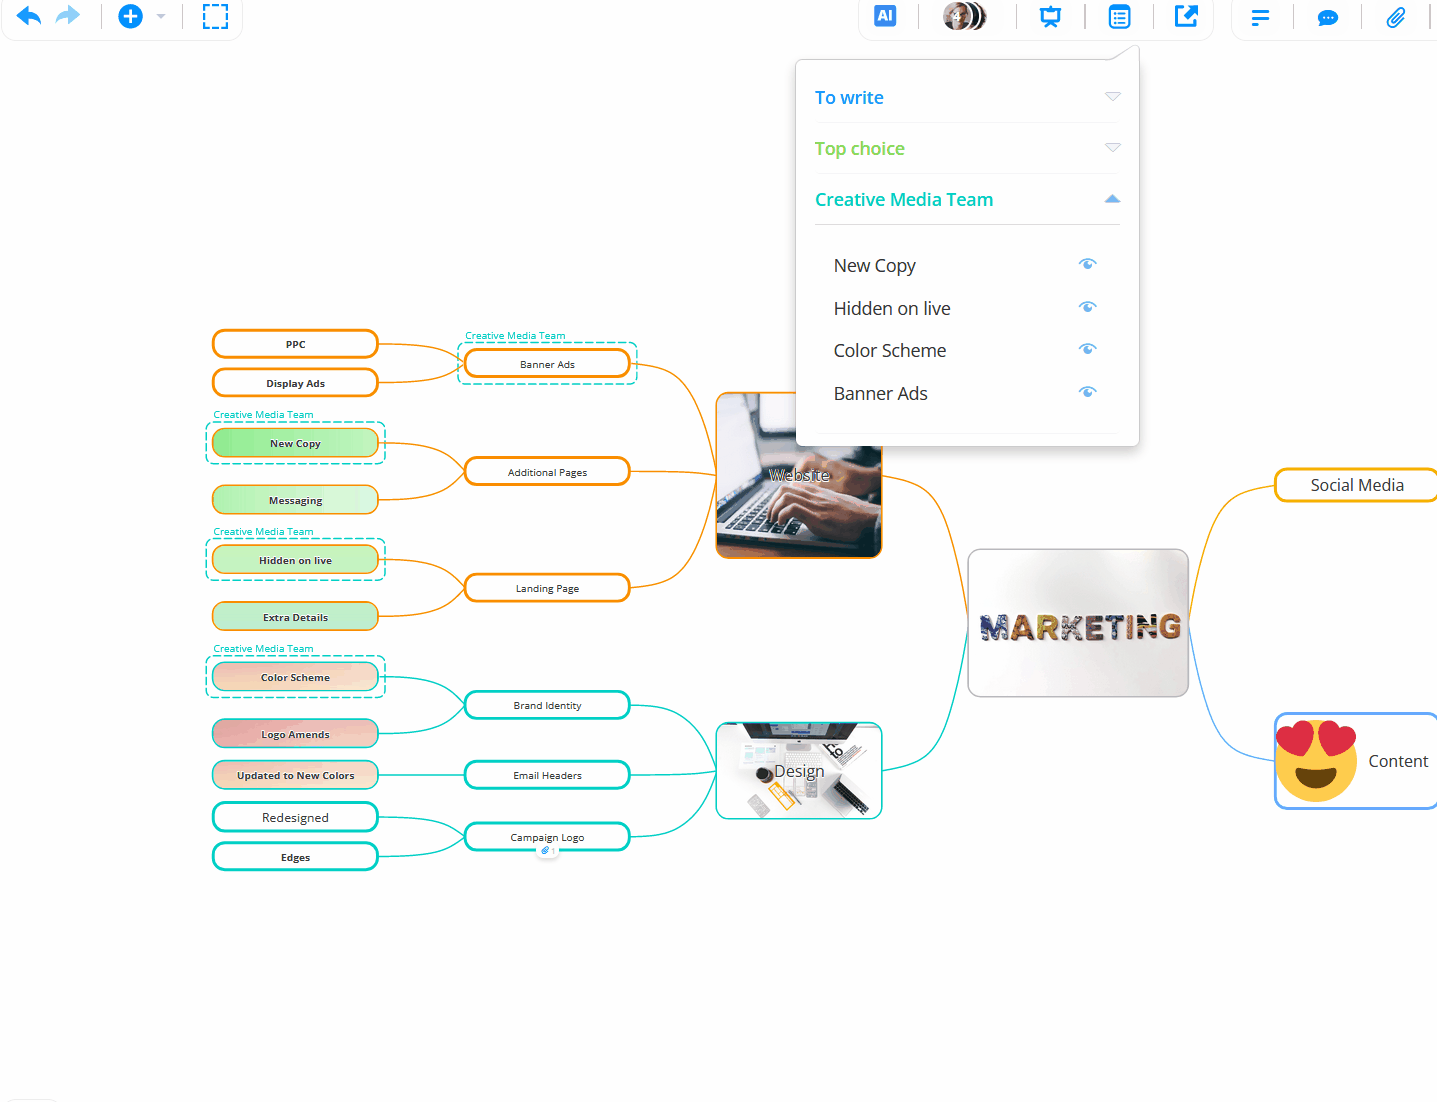
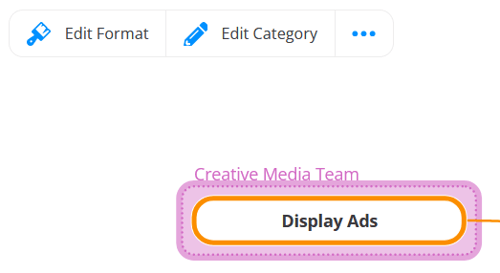
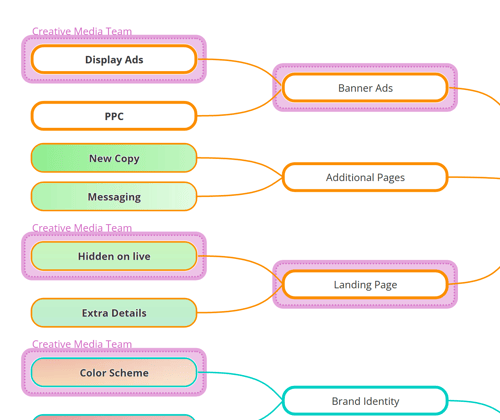
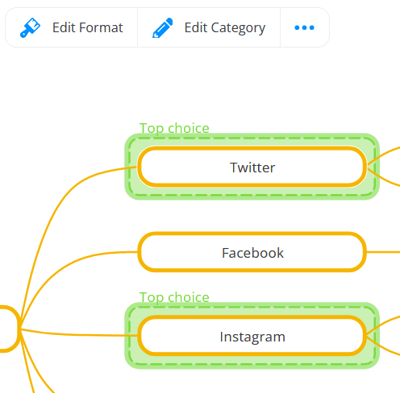
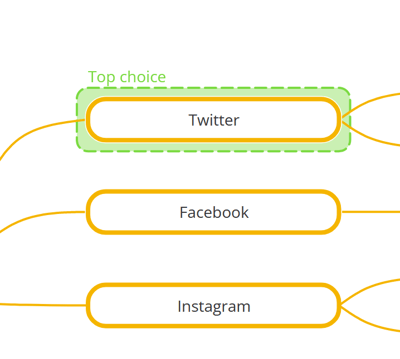
The categories are represented by neat boxes around the branches, to clearly indicate when different ideas fit into a particular group. This ensures you can keep your branches where they are, avoiding the complications of re-organizing your map. You can name the categories whatever you like so there is no limit to how you want to use them.
Creating a category for your branches
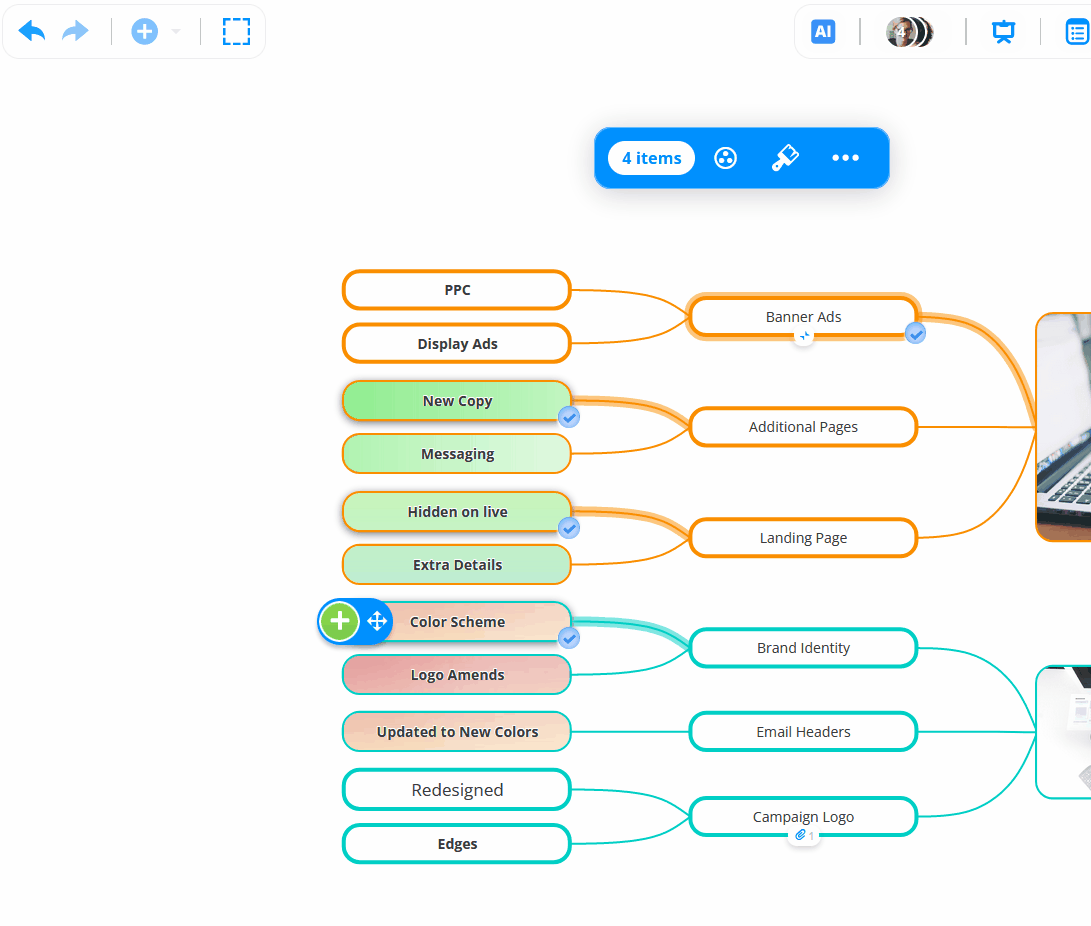
1. First select the branches you wish to make a category for using the multi-select tool. Click on a branch to select it, and then hover over another branch and tick the unselected circle next to it. A blue tick will appear in the circles on each branch. Repeat this process until you have selected your chosen branches. Alternatively, hold CMD/CTRL and click each branches to select them.
2. Once you have started to select your branches a new toolbar will appear on your screen. Select the category icon in the toolbar to create a new category.

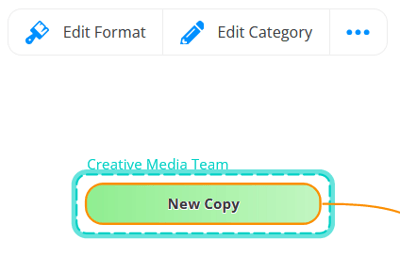
3. You will see a category box appear around the selected branches. You can make changes to the category using the top toolbar.
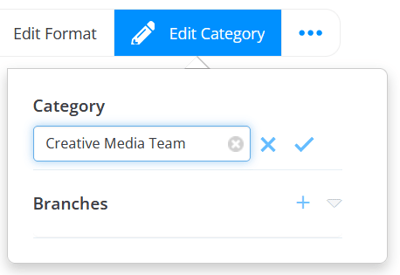
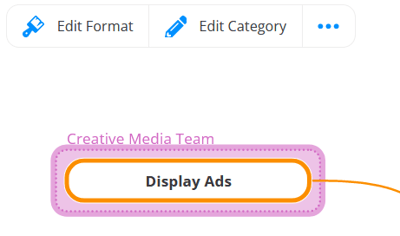
4. Click on the Edit Category in the toolbar and enter a category name. Click the tick to the side to save.
5. The name will show on the category boxes around your branches.
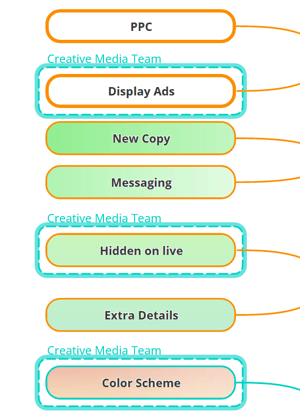
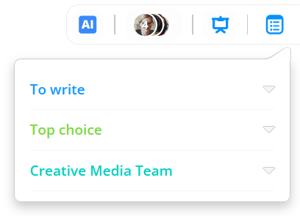
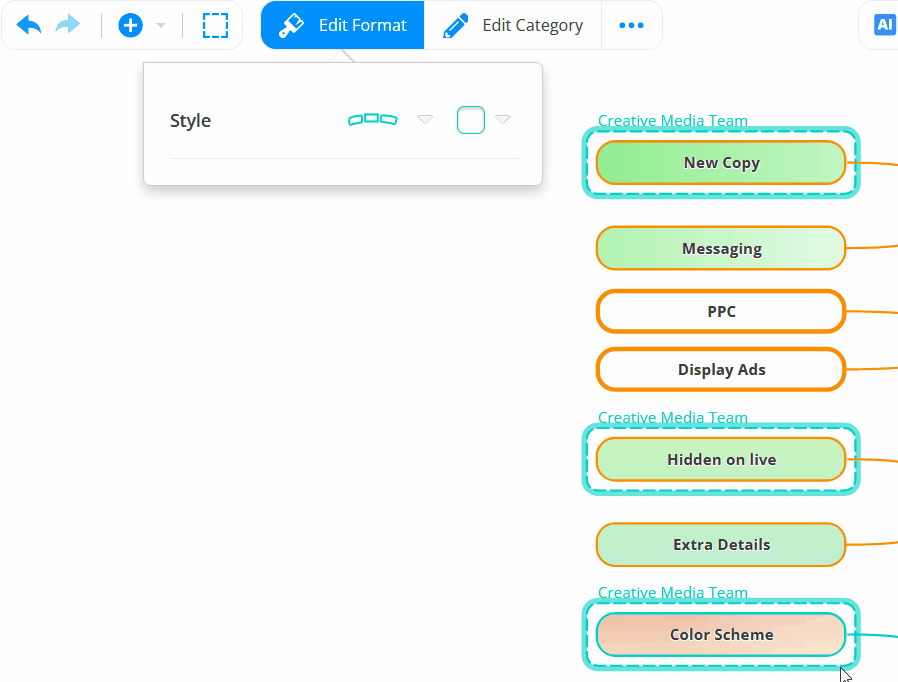
6. To see a list of all your categories and easily locate these branches in your map, select the Categories icon in the top right-hand corner of your canvas. 
7. A list of your categories will appear in the drop-down.
8. Click on the arrow to the side of the category name to show all the branches in that category.
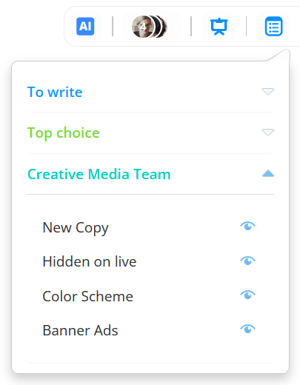
9. Click on an eye symbol to focus in on a particular branch in your map.
Formatting Categories
1. Click on a category box to open the category toolbar at the top of the screen.
2. Click on the Edit Format in the toolbar.
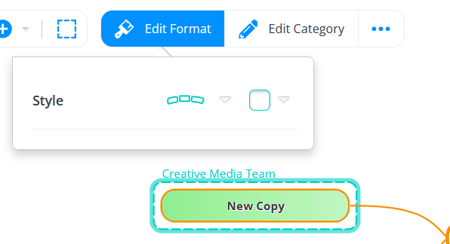
3. Here you can change the style of the box lines and the color.
Adding branches to existing categories
If you have created a category and you need to add more branches to it afterwards, you can.
1. Click on a category box to open the category toolbar at the top of the screen.
2. Click on the Edit Category option to open the menu.
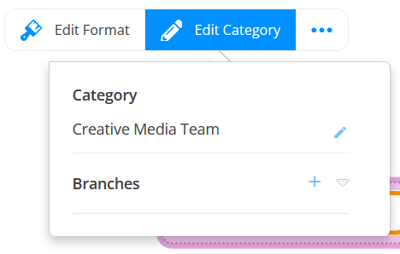
3. Next to Branches, click on the + icon. This will bring down a list of all the branches in your map.
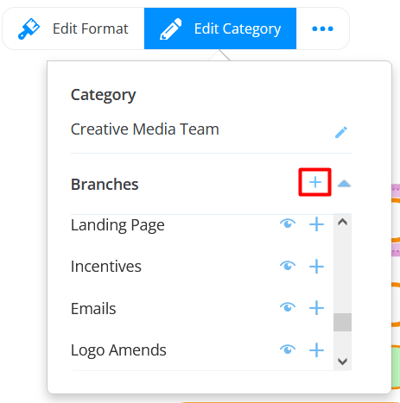
4. Within this list, click on the + icon next to a branch to add it to the category.
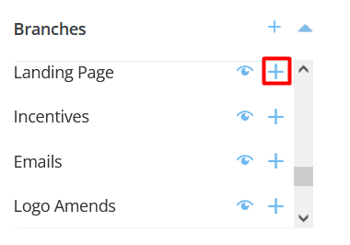
5. A category box will then appear around that branch on your map.
Removing a branch from a category
1. To remove a branch from a category first select one of the category boxes top open category toolbar.
2. Click on the Edit Category in the toolbar top open the menu.
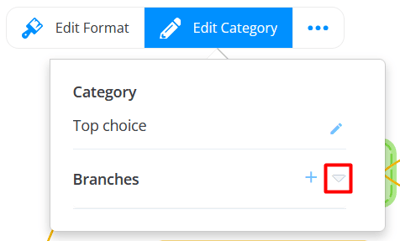
3. Click the down-arrow icon next to Branches to bring down all the branches in that category.

4. Click the X next to the branch you want to remove from that category.
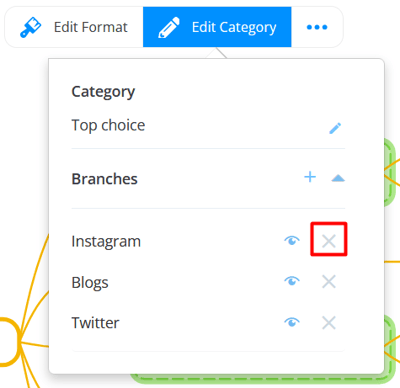
5. The branch will be removed from the category and the category box will then disappear from that branch in your map.
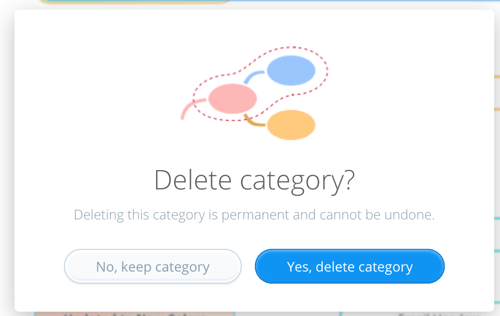
Deleting a category
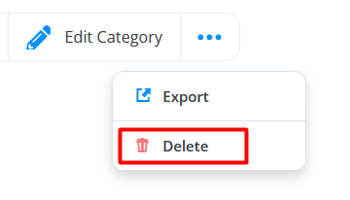
1. To delete a category, select the one you wish to delete to open the category toolbar at the top of the screen.
2. Click on the 3-dot icon in the category toolbar and select the trashcan icon.
3. In a new window, you will be prompted to confirm your decision. Once sure, click: Yes, delete category. This will permanently delete the category and will remove the boxes from around the branches.