-1.svg)
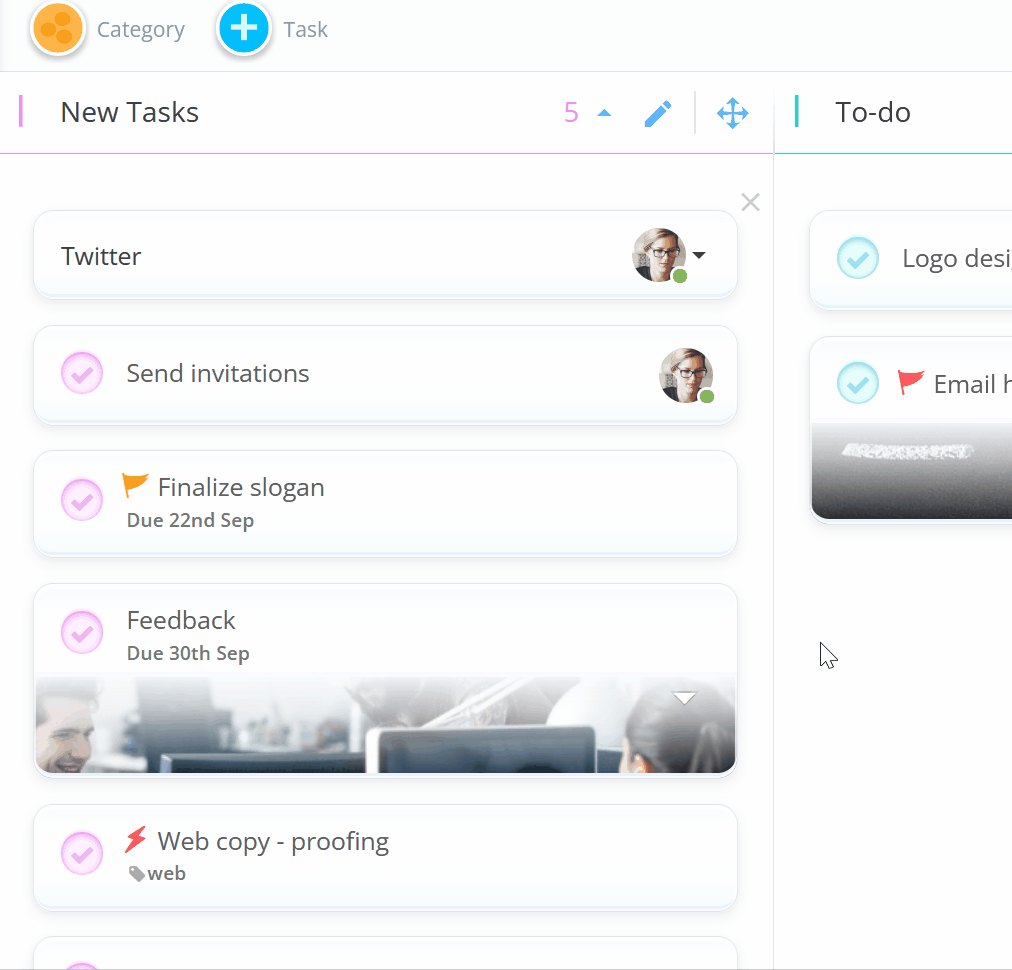
Tasks can be created for anything that you need to do, from 'Pick up milk' to 'Create Sales Report'
To Create a New Task (project workflow view)
1. Click on Task situated in the top left-hand corner, and drag and drop it onto the Canvas.

OR simply double-click on the canvas to quickly add a task.

2. Here, you will be asked to type and enter your task name.

3. When you create a task, you will automatically be assigned to it by default, shown by your avatar to right of the task name box.
To turn this off, start adding new task, then click on your avatar to bring down a drop-down menu and simply un-tick the Assign me to tasks by default option, situated at the bottom. This will remove you as an assignee from this task and any other new tasks that you make.
To assign the task to another member within the Task Board simply choose them from the drop-down menu.
To remove yourself as an assignee from the one task only, simply click on your avatar to open task info and click Unassign. There you can also add other users.
For information on using creating tasks within the Gantt timeline view, please click here.
Delve into the Task Details
The Task Side Panel
Although sometimes hidden out of sight, the task side panel is a powerful space for storing those important details that are vital to understanding your Task Board. These features will help you prioritize, stay on track, informed, and focused (Canvas view shown below):
The side panel glossary

---------------------------------------------------------------------------------------------------

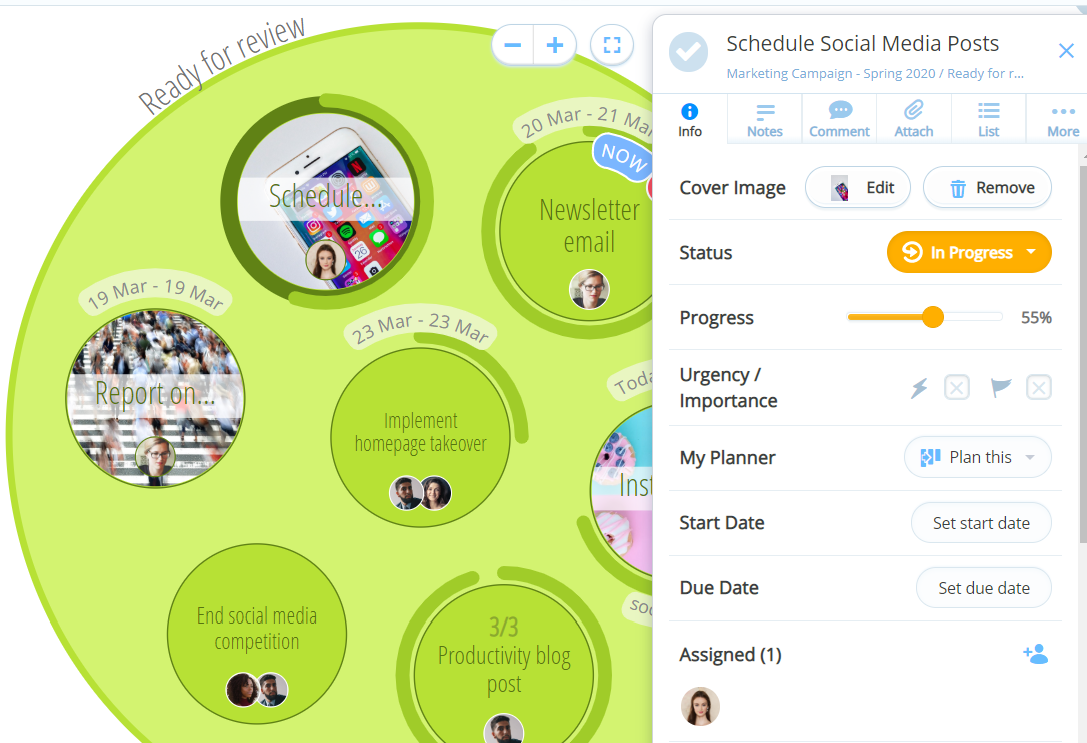
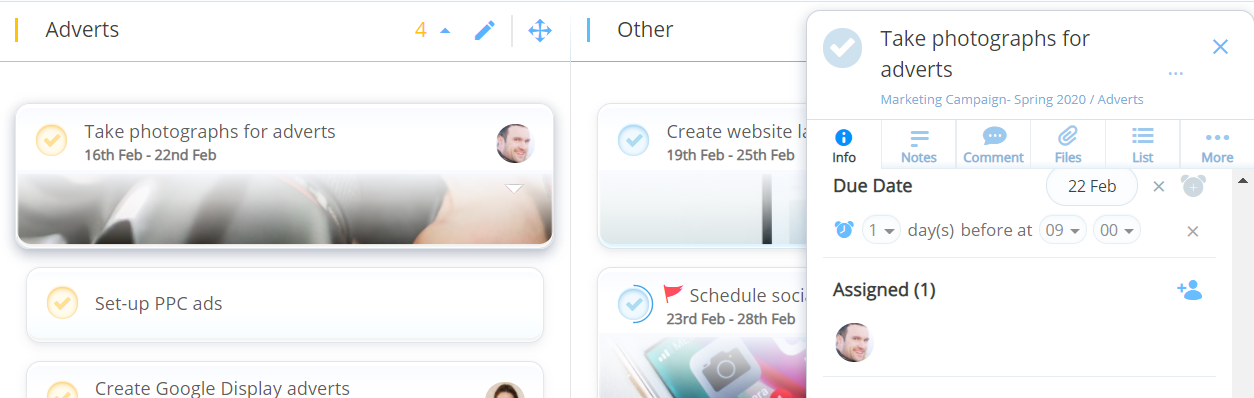
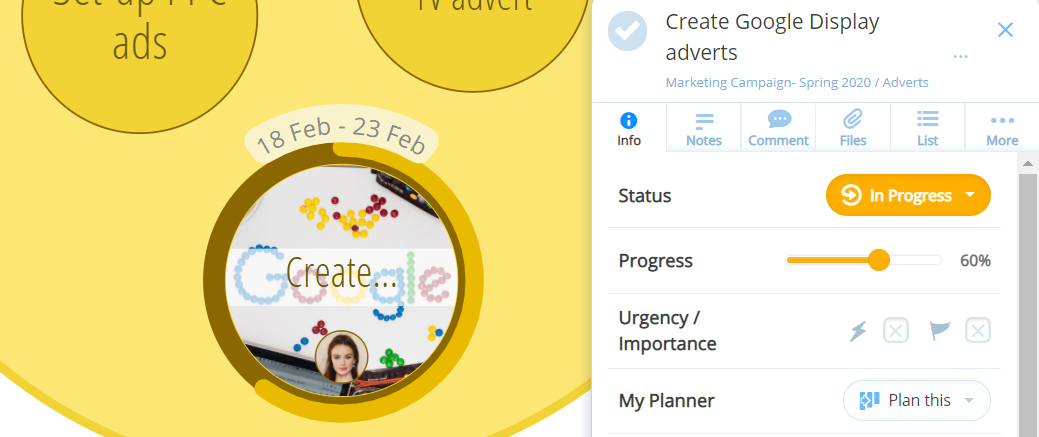
Information tab containing main task details such as progress bar, Start & Due dates, assigning team members, Urgency/ Importance, tags and an option to add it to your planner.
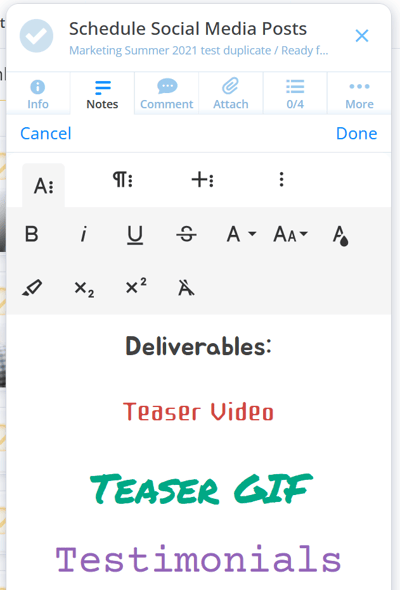
In the notes tab, you can add additional information about the task using different font styles, colours and sizes.

The comment section allows you to discuss the task with other members of the task board to ensure the conversation stays on course.

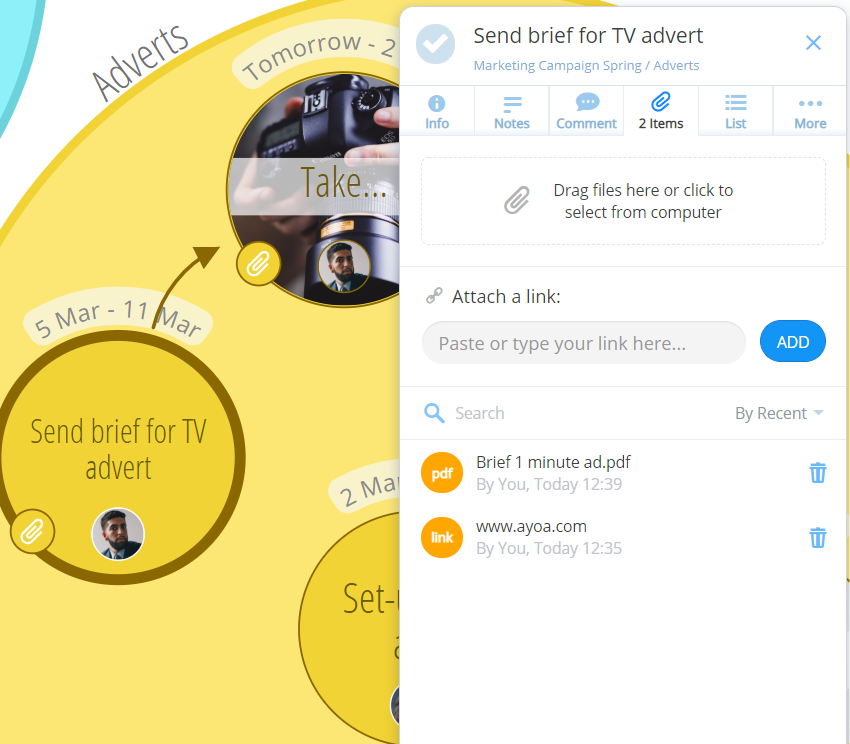
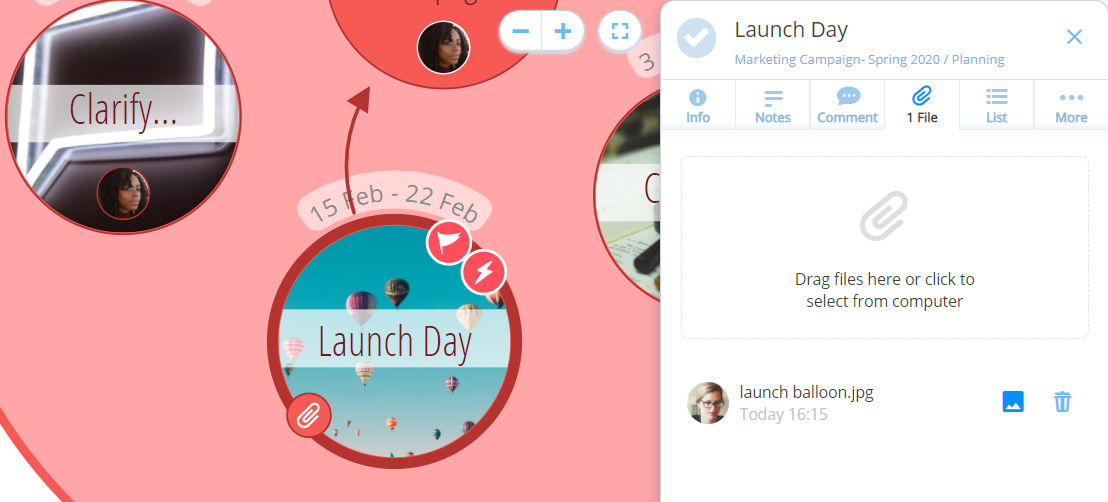
In the attachment tab, you can upload documents relevant to that task. If you upload an image you will have the option to turn it into a cover image for the task.
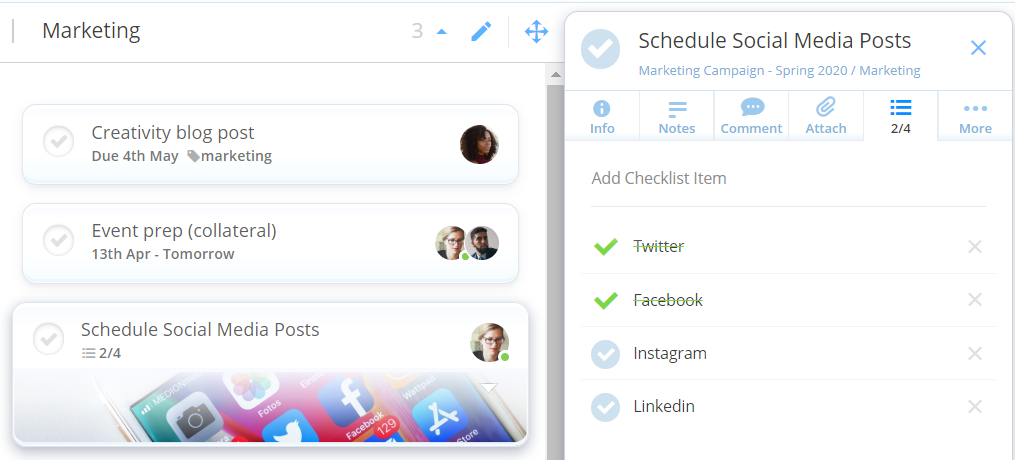
The list tab allows you to create and manage a checklist so that you can see what you need to get done.
Under more, there are options to view the full edit history of the task, the options to duplicate the task, copy a link to a task, convert it to a category and turn off your notifications for that task.
The Main Components of a Task
1. Notes - In the notes section, you can add more detail about the task, informing others (and yourself) of what that task entails and the aim for completion. Simply click on the ‘ Add notes here’ in the note tab- the second tab on the task. You will see the notes box appear along with formatting options. There are no rules here, add an unlimited amount of information that will help guide you through your work. Style your text with rich formatting to draw attention to key sections.
2. Checklists - Here is where you can break down a task into smaller bite-sized chunks. Click on the 'Checklist’ icon in the fourth tab in the task panel, type away in the 'Add Checklist Item', hit ‘Enter’ and add as many items as you like. As you complete each one, click the circle to the left of the item to cross it off. Now you’re tackling larger tasks and tracking their progress step by step.
3. Start and Due Dates - We all know there are dates we just have to get something done by, so add a start or due date to your task in the info tab (the first on the right) side panel. Scroll down and click ‘no start date’ or 'no due date' to bring up the calendar and once chosen, your date and time will instantly be added to your Task Board.
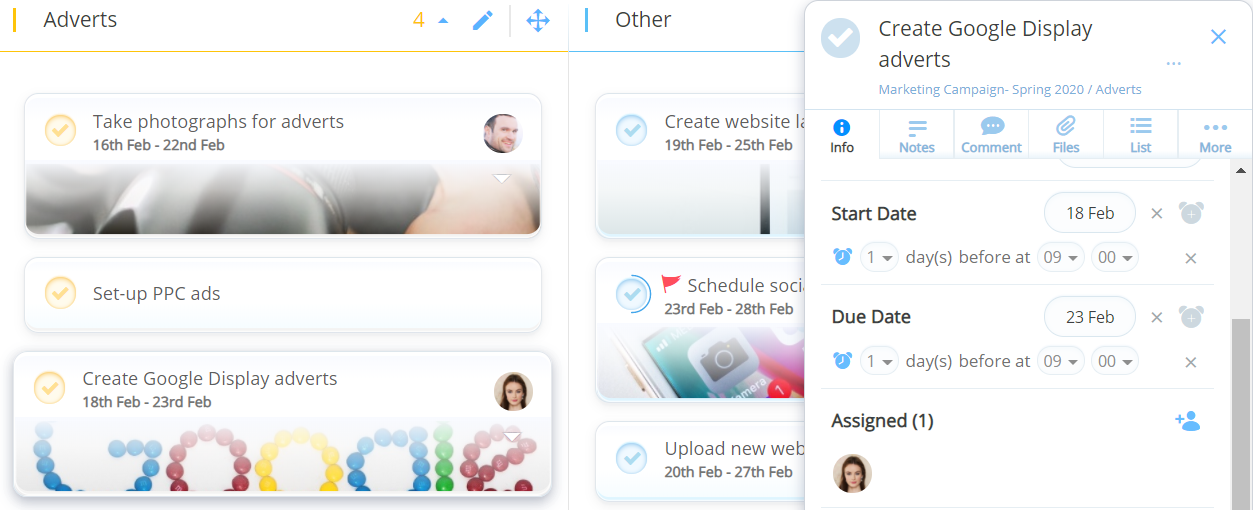
4. Assignees - Collaborate and delegate work by adding team members to tasks. You can do this by clicking ‘Add Assignee’ icon in the first tab on in the side panel and choosing a member from the drop-down menu. Once added, you will see their avatar appear on the task so you can easily see at a glance who has control over what in your Task Board.
5. Progress and Status - The progress percentage bar is a fun and flexible way to track progression. Simply drag the bar across the screen depending on how much of that task you have completed. As you do this, you will see a bar grow around the task in your workspace and the percentage increase in the side panel. When adjusting the progress bar, it will trigger the status of the task, so you will know at what stage is the task.
A little extra...
1. Cover images - There’s a reason we made Ayoa so visually exciting, so do it to your own boards too! Taking the time to add images to your tasks can greatly enhance your focus and engage your attention when working on Task Boards. To add, click the ‘Attachment’ icon at the top of the side panel ( the third from the right), choose the picture from your computer and click the option 'Make Cover'.
2. Tags - This feature allows you to add keywords to your tasks to help organize your Task Board further. To add a tag, click on your task to bring out the side panel, and click the 'Add more details' at the bottom of the Info tab (the first on the right) and choose tags. Simply start typing and hit enter to add your tag. When you add a tag to another task, it will suggest tags you have already created in a drop-down. We recommend using short and concise wording that highlights a theme or category that your task belongs in.
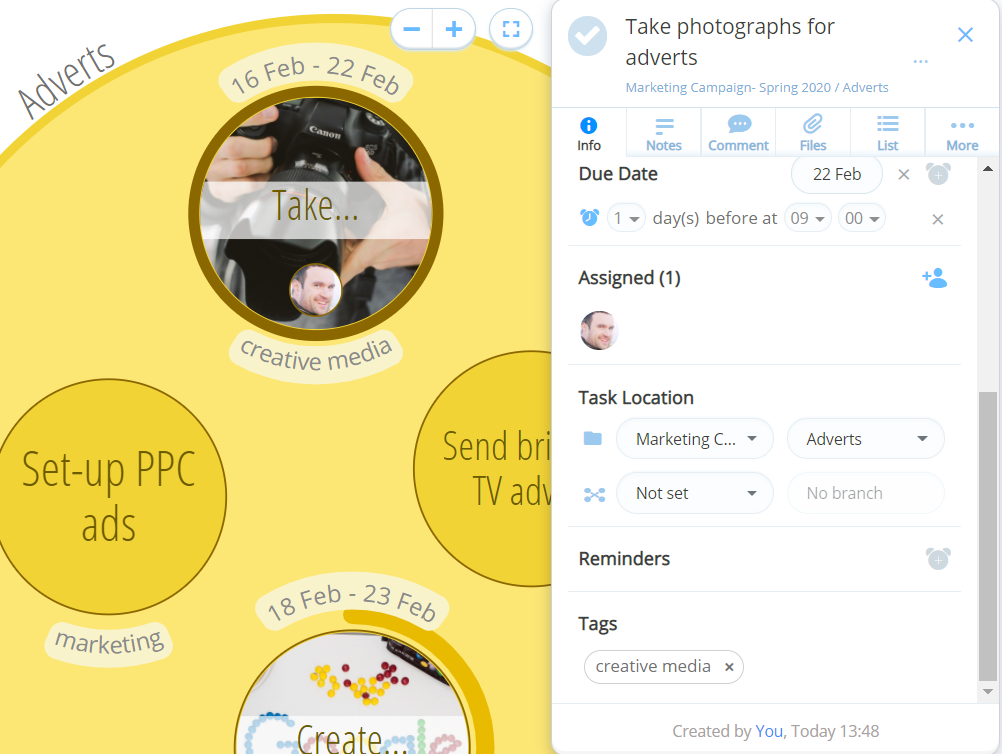
3. Important and Urgent - adding an importance flag will ensure that tasks with a higher priority won't be forgotten about. Easily spot the red flags dotted around your canvas and instantly work out what needs your dedicated time and energy. Similarly, adding urgency will pinpoint the areas that need your attention fast, represented by a lightning bolt on your task. For both urgency and importance, there are three levels, of which you can adjust at any time in the side panel.

4. Attachments - Attaching files to your tasks will help keep everything all in one place, making your life easier. This will massively increase your productivity, ensuring no more flicking back and forth between different windows. To add an attachment, click on the paperclip icon in the side panel. There is also the option to add multiple web-links.